Account Registration & Login – External Users
The Account
Registration feature allows an external person to register for an account to
access eGrantsPlus from the Login screen.
There are three types of external accounts that can be created:
- Organization
Applicant User Account: An organization
(represented by a person) that will apply for financial assistance in the
system. Prior
to being able to create applications as an organization applicant, the
organization record must be verified. The steps for organization
verification are explained later in the document.
·
Individual Applicant User Account: A person who will apply for financial assistance as
an individual and not as a member of an organization.
·
External Review User Account: A person who will
participate as a reviewer in the funding process but who is not a member of the
granting organization.
Account registration, regardless of
applicant type, begins on the Login screen by clicking the ‘here’ link in the
Click here to register for an account phrase.

The account registration screens will guide
the user through the account creation process. The process for each type of
applicant is described on the following pages.
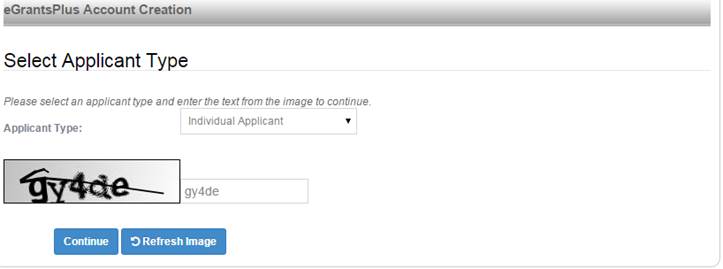
Register for Account as Organization Applicant
Select the Organization Applicant type and
enter the text string that is shown on the “captcha” image. This security measure helps to combat
automated attacks on the system. If the image cannot be clearly read, click on
the Refresh Image button to get a new image.

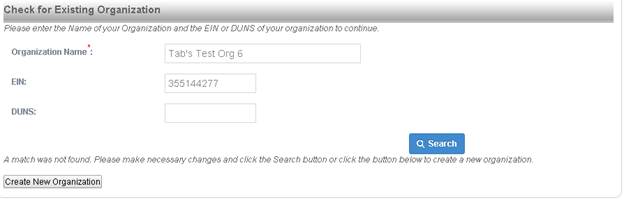
Click the Continue button. The Check for
Existing Organization screen is displayed. The organization name and either EIN
or DUNS must be entered.
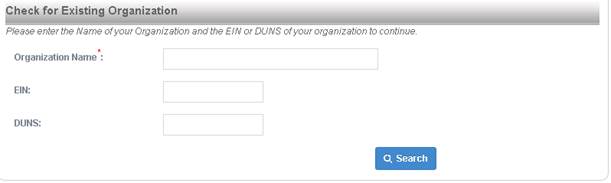
Click the Search button after entering the
data. The information entered will be compared against the existing verified
organizations to determine a match. If there are no existing verified
organizations under the organization name and EIN or DUNS, the user will be
prompted to create a new organization.
Click the Create New Organization button and
enter the organization information. Required items are indicated via a red
asterisk.
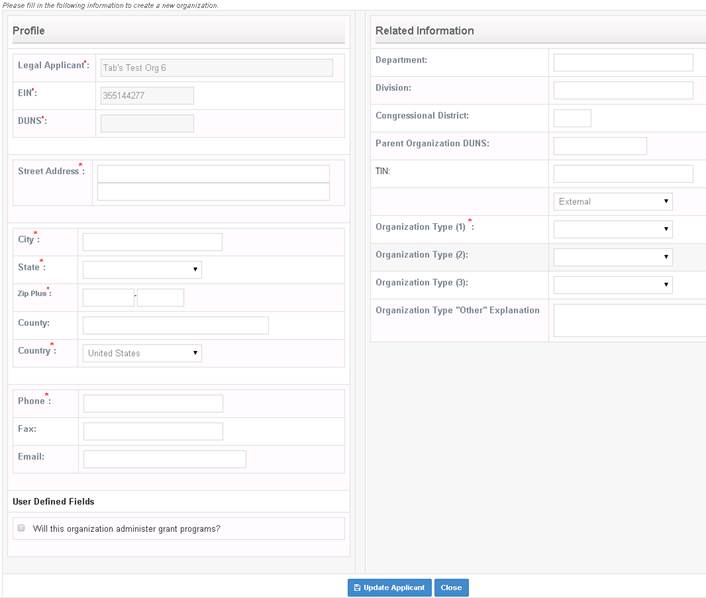
Click the Update Applicant button. The user
will be prompted to enter personal information.
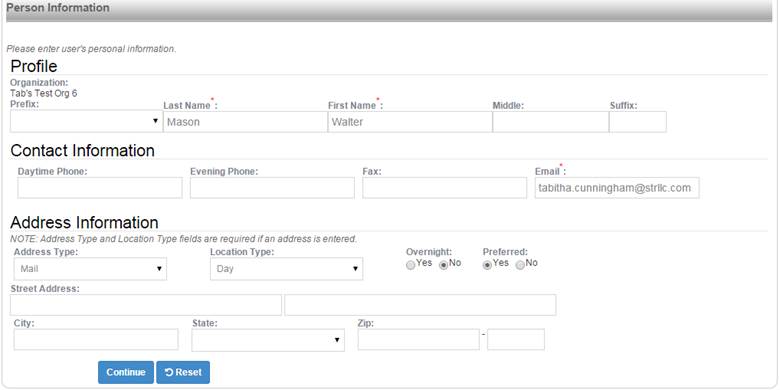
Click the Continue button. The user will be
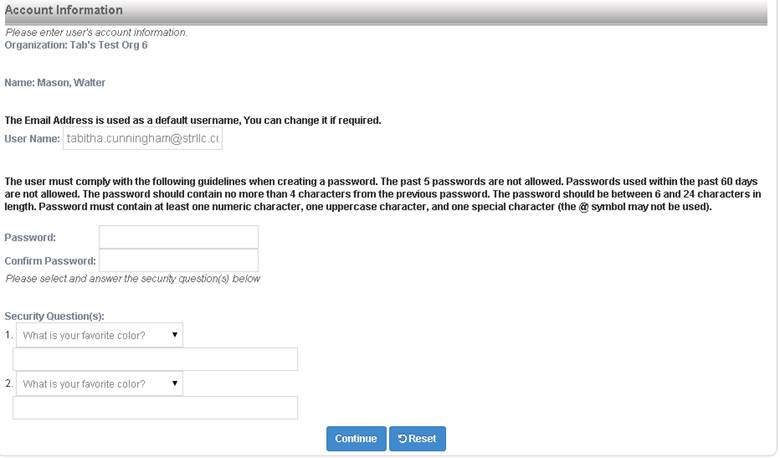
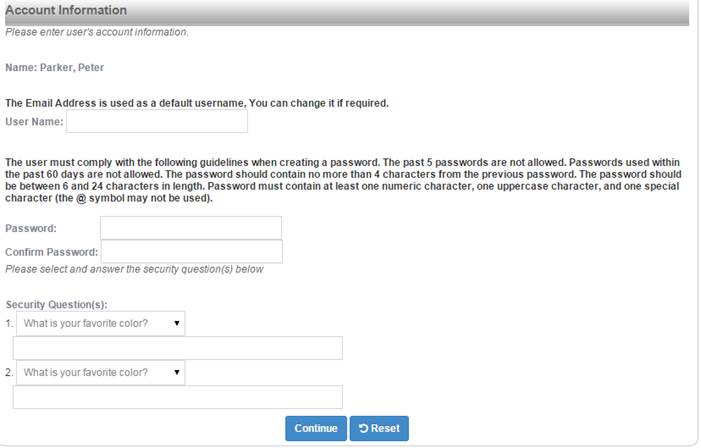
prompted to enter the account information.
The password is case sensitive. The password policy is displayed to
provide guidelines for creating a password and the answers to the security
questions are used in the event a user forgets their password. The user may
select which security questions are assigned to their profile from the list of
available active security questions. The password policy and security questions
are specific to each client’s configuration.
Click the Continue button and the following message is received.
![]()
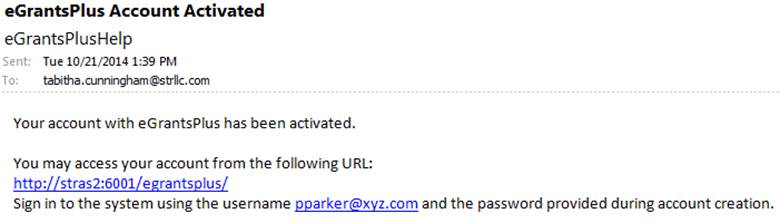
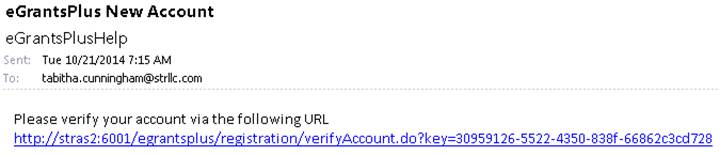
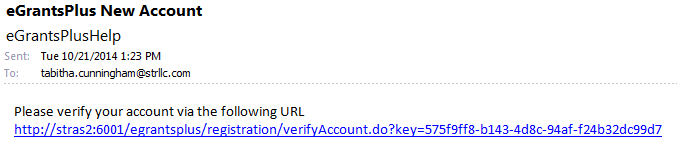
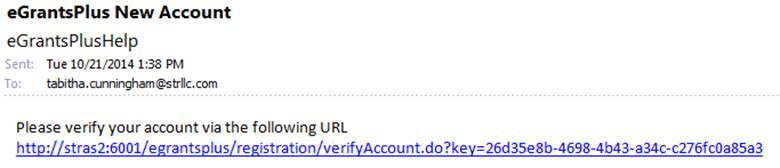
The user requesting the account will receive an Activation email sent to
the email entered on the personal information screen. The user must click on
the Activation link in the email prior to being able to login to eGrantsPlus. This email confirms the
email address entered is indeed valid for the user requesting the account. See
the screenshot below.
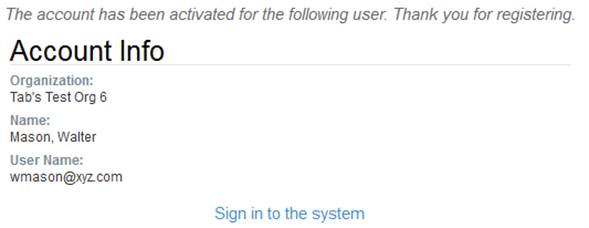
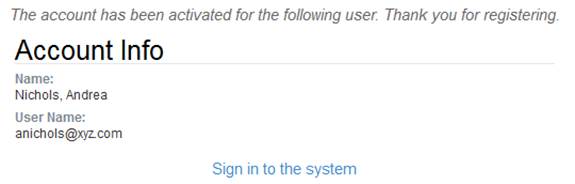
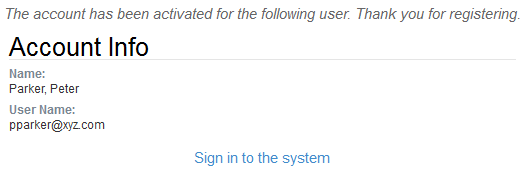
The following message is displayed once the activation URL is clicked.
Activation URLs are set to expire after 10
days. If the user has not activated
their account prior to the expiration of the URL, they will see the following
message and will need to re-apply for an account:
![]()
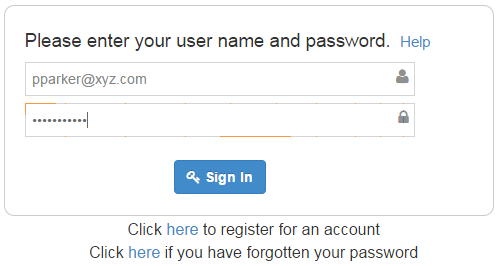
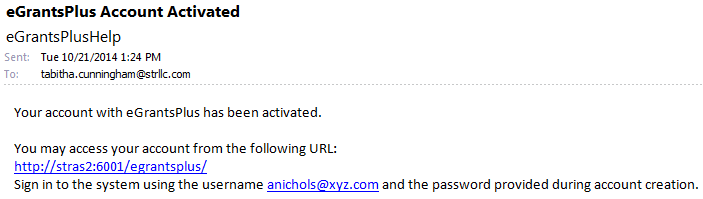
The user will receive a second email providing information to login to eGrantsPlus.
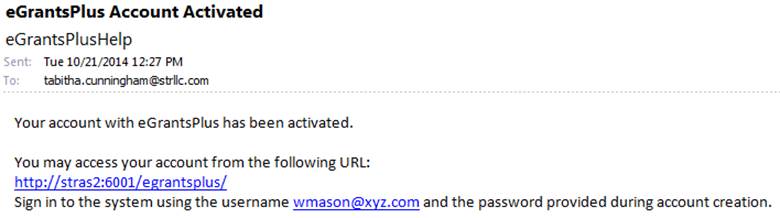
At this point, the user is now able to
successfully login, but will not be able to create an application until their
organization has been verified by staff. They will be able to update their
profile and change their password, if necessary, prior to organization
verification. Once staff has verified the organization, the user will be able
to create applications under their organization.
Organization Verification
Newly created
organizations (through the registration process) must be verified prior to
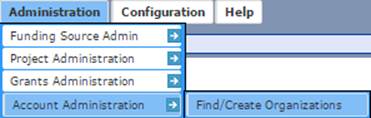
creating applications against them. The verification process requires the staff
person to search for the organizations record by using the Find/Create
Organizations sub-menu item under the Administration à Account Administration à Find/Create
Organizations.
The organization
record will be in a status of Unverified. The organization in the following
screenshot is Unverified.
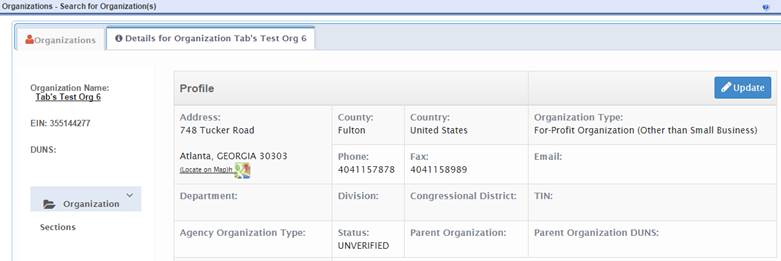
Clicking the
Unverified link will display the following screen, if
there are no existing similar verified organizations. The button reads Add This
Organization and clicking it would verify the organization and change the
status to Active.


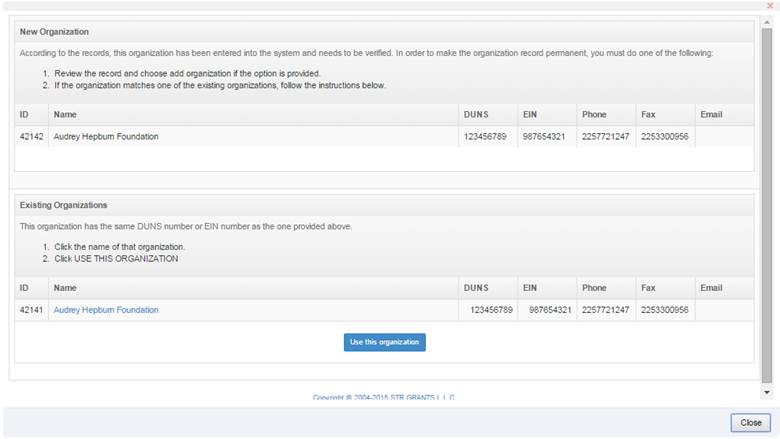
If there were existing
verified organizations – for example, a future organization similar in all but
name for the recently verified organization, the following screenshot would
display. The name, DUNS, EIN, phone, fax, and email of the new organization are
shown at the top of the screen. The comparable information, if applicable, for
existing verified organizations is shown at the bottom of the screen. The staff
person may click the organization name link at the bottom and the Use this
Organization button to verify the organization.
Once verified,
the organization status changes to Active and the staff user is returned to the
home screen. It is at the point of organization verification that the user is
automatically given the Grantee (GRTEE) role to permit application creation
under the verified organization. The first person under the organization is
designated as the organization’s administrator and automatically receives the
Grantee Administrator (GRTAD) role.
Organization Match Found
In the event the
search for the following information returned a match with an existing verified
organization, the organization information would not need to be re-entered. The
user would need to confirm the information displayed as their organization
information.

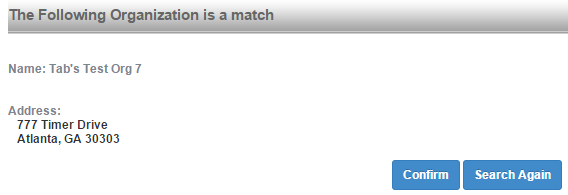
Clicking
the Confirm button will continue with the normal process of the user being
prompted to enter personal information (see screenshot below). However, once
the account is activated by clicking the URL in the activation email, the user
will be able to immediately create applications under their organization. The
organization has already been verified and the user automatically receives the
Grantee (GRTEE) role.

Register for Account as Individual
Select the Individual Applicant type and
enter the text string shown in the “captcha” image.
Click the Continue button to display the
screen for entering personal information. At a minimum the user should populate
all fields with a red asterisk.

Clicking the Continue button will allow the user
to enter their account information and provide the answer to the security
question(s). All elements of the password policy must be met when creating a
password.

The following message is displayed once the
Continue button is clicked. The user is also automatically given the Grantee
(GRTEE) role, but will be unable to create applications until the account has
been activated.
![]()
An email containing a link to activate the
account is sent to the email address entered when completing the personal information
screen to provide validity to the email address of the user requesting the
account.
Clicking the activation link will display
the following screen.
A second email will provide instructions for
login.
When an individual account is requested,
there is no organization verification necessary. Therefore, the user is able to
login and create applications immediately after the activation link is clicked.
See the following two screenshots.
Register for Account as Reviewer
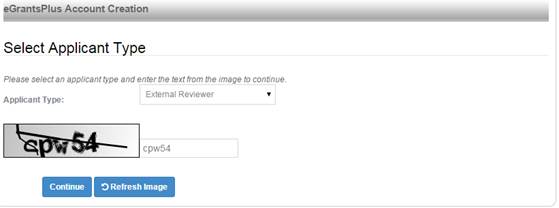
Select the External Reviewer applicant type
and enter the text string shown in the “captcha” image.
Click the Continue button to display the
screen for entering the reviewer’s personal information. At a minimum the user
should populate all fields with a red asterisk.

Clicking the Create Reviewer button will
allow the user to enter their account information and provide the answer to the
security question(s). All elements of the password policy must be met when
creating a password.
The following message is displayed once the
Continue button is clicked.
![]()
An email containing a link to activate the
account is sent to the email address entered when completing the personal
information screen to provide validity to the email address of the user requesting
the account.
Clicking the activation URL in the email
displays the following message.
A second email provides instructions for
login. The user applying as an external reviewer must still adhere to the
reviewer acceptance process. This registration process allows the user to
obtain login credentials so they may continue entering the necessary
information to apply as an external reviewer. Thus, the screen displayed upon
login is the reviewer application.